Pope Phoenix: Designing a Hip-hop-inspired playing card deck in Affinity
Playing cards have always fascinated me as a design system. Every symbol, character, and layout choice has to work individually while still feeling connected as part of a complete deck. So when Affinity asked me to create my own take on a playing card set, I saw it as an opportunity to explore that balance between form and function. Here’s a breakdown of how I developed the theme for the deck and created the royal flush design in Affinity.
Step 1: Ideation and research
After exploring a few different directions, I narrowed the themes down to Afrofuturism, Hip-hop culture, and a Wakanda-inspired royal family. We decided early on that focusing on the face cards would give me the best opportunity to showcase my illustration work, which then led to a royal flush concept inspired by the four pillars of Hip-hop: MCing, DJing, Breaking/B-boying, and Graffiti.
Each face card would represent one pillar, alongside a single number card, the 10. In total, the project would include four face cards, one number card, and a custom back design.
From there, I started gathering references to better understand the structure and visual language of traditional playing card decks, and the frameworks I needed to work within. You can see the full mood board here on Pinterest.
Step 2: Thumbnails and rough sketching
King of Spades seemed a fitting name for the project, and with the core visual concept established: translating the four pillars of Hip-hop into the structure of a royal flush, I started sketching a wide range of ideas while also questioning what defines a successful playing card design.
I found one of the biggest challenges was incorporating symbolism and cultural references without leaning into stereotypes of the genre.
Some of the early concepts pushed into more editorial territory and functioned more like magazine covers than playable cards. I wanted to go down the magazine route, but the more I developed the idea, the clearer it became that function had to lead the design, and that I needed to let it go. Leaning into a traditional playing card format for this project allowed the illustrations to work practically while still giving me room to develop the visual identity of each character. The mirrored face card structure also ensured the cards remained readable no matter how they were held or thrown.
Choosing a traditional flipped-card layout over more experimental compositions ultimately strengthened the deck. The constraint wasn’t limiting, it clarified the work. It forced every illustration, pose, and graphic element to function as part of a system rather than exist as standalone images.
When I started creating the characters for each pillar I had difficulty finding references that had the right angle of the face or positioning of the body to work within the structure of a playing card. Film poster artist Drew Struzan famously used himself as a model before adding the faces of the subjects he needed. I’ve done this in the past for a few illustrations, but instead of posing as the model, I began merging multiple references from different sources to build custom compositions that better suited the format. Those collaged poses then became the foundation for several rounds of sketches used to refine each character.
Every pose needed to communicate the personality and energy of its pillar while also functioning within the mirrored, interlocking structure of the card once flipped. This process became especially important when developing the DJ and Graffiti cards.
Step 3: Refining the sketches and vectorizing in Affinity
The main illustrations began as rough sketches in my sketchbook before being transferred into Affinity for further refinement using raster pencil brushes. I approach this stage much like working in a traditional sketchbook, constantly erasing and redrawing rather than relying heavily on digital shortcuts like transform tools or cloning.
I use these refined sketches as a foundation rather than a final drawing, knowing the illustrations will continue evolving throughout the process. After spending so much time looking at an illustration, it becomes easy to miss obvious errors, so staying flexible is an important part of refining the work.
Getting the illustrations to work once flipped was one of the biggest challenges. While building each card, I constantly had to think about how shapes, poses, and details would interlock once mirrored. Concept and execution rarely align exactly as imagined, so every illustration required adjustments as the system developed.
Some changes were simple node edits, while others involved creating duplicate outlined versions of the full illustration and using a combination of clipping masks and the Erase blend mode to control how different sections connected. Once that system was in place, it became much easier to find cleaner and more concise ways to present the artwork while still preserving the story being told on each card.
Working in Affinity made this process much more fluid because both vector and raster tools are built into the core of the app. I could sketch, refine, and adjust ideas on the fly without needing to move back and forth between my sketchbook, camera, and separate design apps. That flexibility sped up the workflow considerably and made experimentation far easier throughout the project.
Step 4: Coloring
I wanted the colors to feel bold, vibrant, and energetic, the same way I see Hip-hop.
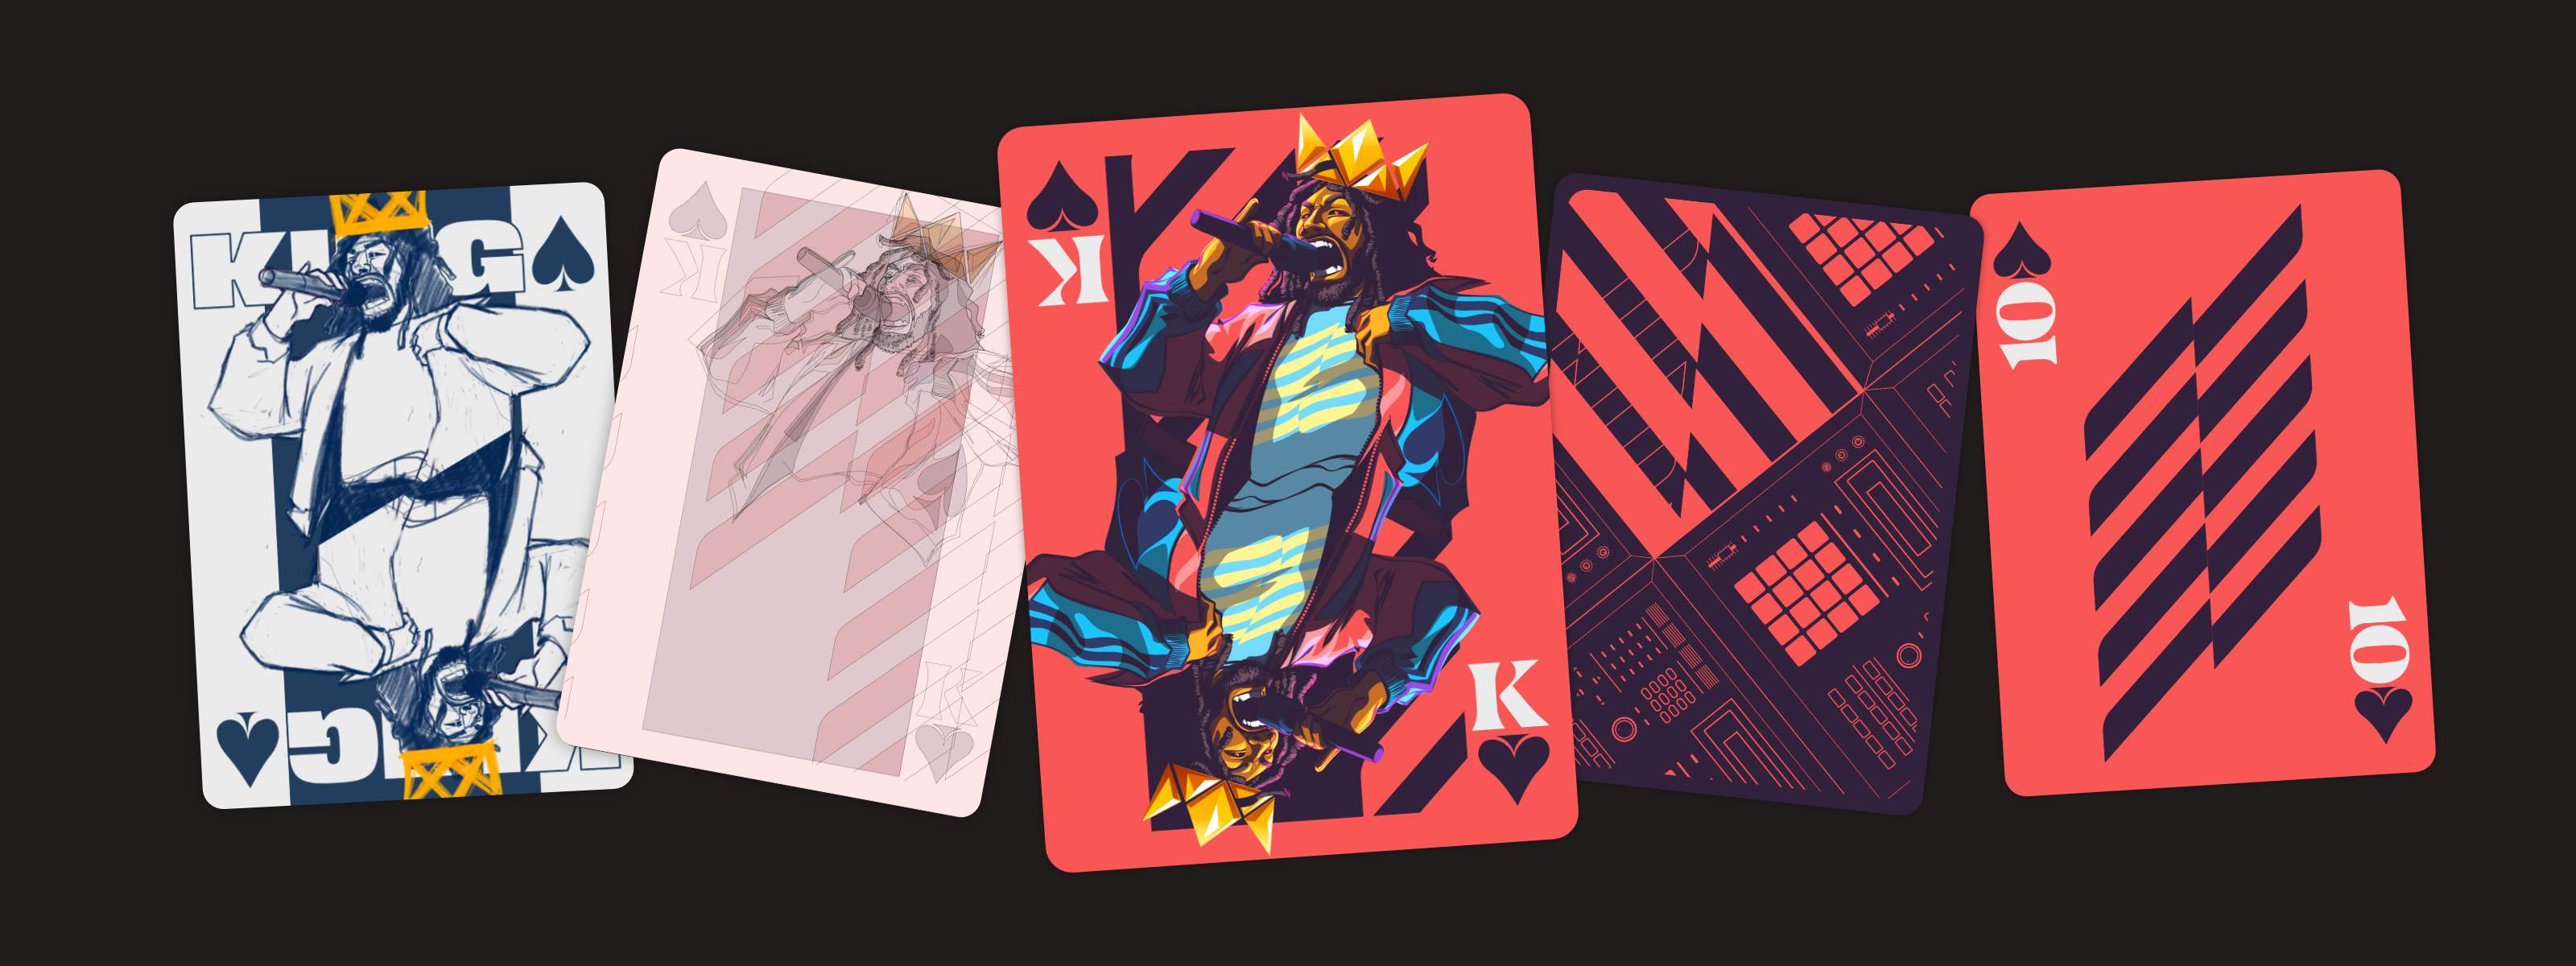
The color palette started to take shape while working on the King card and became more solidified as I moved through the rest of the deck. At the center of the palette is a rich red with a mid-range luminosity. If seen on its own it looks dull, but becomes vibrant when paired against its counterpart, a deep moody purple. Those two became the core colors of the King of Spades project.
They are accompanied by two secondary colors, a dull yellow and a vibrant blue, with a light electric blue used for highlights, alongside an off-white for typography and graphic details.
Together, the palette creates a strong visual contrast across the entire deck. The red card fronts allow the illustrations and their energy to come alive, while the deep purple backs create a darker counterbalance with the graphics outlined in red.
I approach color the same way I would in traditional illustration. I treat the linework like inked drawings and build separate color groups underneath it. It’s probably a slower process than people would recommend, but it’s still my favorite way to work.
Step 5: Building the front of the Ace, King, Queen and Jack cards
Once the main illustrations for the face cards were done, I focused on making sure everything aligned consistently as a system, adjusting layouts and details where necessary.
The next time I do a project like this, I’ll build a dynamic template system from the start by converting the final layout into a Symbol. That way, any adjustments made to the layout would automatically update across every iteration throughout the entire project.
Step 6: Adding some gritty, hand-drawn details
Having access to both vector and raster tools inside Affinity allowed me to build the Jack title directly from sketches instead of relying on a typeface from a foundry. Early Hip-hop flyers from the ’70s and ’80s were often built using hand-drawn lettering long before desktop publishing apps existed, so creating custom typography felt like the right approach for the Graffiti card because it tied back to the artform itself.
To push the lettering further, I modified one of my Tombow markers by taking a razor to the nib to rough it up and give it more character, James Victore-style, then went to work in my sketchbook.
After filling pages with marks, I took pictures of the sketches, brought them into Affinity, used the Image Trace feature, and began refining the strongest ideas.
Traditional techniques provide a level of unpredictability and organic texture that helps bring life into digital illustration, especially in contrast to the precision of vector artwork.
With the Jack title it was important to capture the energy and chaos of graffiti authentically. When the design was complete I felt it needed a final touch to lock it into place visually. Spray paint is naturally chaotic, and it took a session of trial and error before I found the right collection of brushes from True Grit Texture Supply and the base Affinity sets to get the look needed. I couldn’t rely on just one brush to do the job, it took a process of mixing, matching, layering, erasing elements from different strokes to emulate the right kind of splatters, sprays, and drips.
Step 7: Creating the number 10 and back of the cards
The final stage was finding a way to visually connect the entire deck, including the number card and the back design. The number card went through several iterations throughout the project. At one point it featured simple dot systems, then bass line-inspired graphics, but one thing I deliberately avoided was leaning on obvious symbols like oversized microphones or vinyl records. While those visuals are closely associated with Hip-hop, I wanted to avoid leaning on the most stereotypical iconography of the genre.
I eventually landed on a stylized graphic equalizer for the number card and an MPC-inspired design for the card backs. Both are iconic aspects of creating Hip-hop without being the most typical references. The equalizer reflects the movement and rhythm of the beat, while the MPC is a modern staple used by Hip-hop producers.
Designing the card backs took quite a bit of trial and error because I wanted them to have as much visual impact as the face cards. The solution came from turning the MPC graphic into a repeating pattern, rotating and flipping elements at different angles while allowing portions of the design to show outside the clipping mask I placed on the back.
It also felt important to incorporate the number graphic into the back design without its bold shape dominating the composition. Using the Vector Crop tool, I trimmed the form down to its core shape and slid it into the same space occupied by the MPC graphics. This added an extra punch of color and helped tie the entire deck together visually.
Final thoughts: Building a cohesive playing card design system
Working in Affinity made it easier to build and refine the deck as a complete system rather than a series of individual illustrations. Being able to move fluidly between sketching, vector design, typography, and texture building in the same space allowed ideas to evolve naturally from rough concepts into finished cards without breaking my creative flow.
What makes this project successful for me is that each card can stand on its own, while composition, typography, symbolism, and color work together across the deck to create a cohesive visual system.
If I continue expanding the project in the future, I'd want to build on that system carefully, preserving the balance, rhythm, and visual language that make the deck work in the first place.


